Glow
Glow
The Glow is a dangerous high-risk, high-reward dungeon known for its valuable loot, heavy radiation, and constant player activity. While environmental hazards and robots pose a threat, the greatest danger comes from other players, as the Glow is a highly contested PvP hotspot.
The location consists of a large surface crater leading to multiple underground levels. The entire area is irradiated, so it is strongly recommended to use Rad-X before entering to increase radiation resistance. If your radiation level becomes too high, use RadAway to reduce it.
Enemies in the Glow are primarily robots. They are weak against electric damage, but generally have low durability and can be destroyed with most weapon types. Eye Bots use electric prods that can stun the player, making them dangerous in groups.
Various doors require colored keycards (Yellow, Red, Blue), which are used on nearby card readers. These same keycards are required to open the Level 5 armory doors, where they are consumed upon use.
Some doors require electronic lockpicks to open.
Most containers are locked with complexity (100).
The Glow also contains numerous old computers that can be scavenged for microcircuits.
Quick Walkthrough
- Surface: Enter the crater.
- Levels 1–3: Collect 3 Yellow and 2 Red keycards.
- Level 4: Use the central computer to trade 2 Yellow + 1 Red → 1 Blue keycard.
- Level 5: Use 1 Yellow, 1 Red, and 1 Blue keycard to unlock the armory and loot.
- Exit: Activate evacuation protocol on Level 5 to open shortcuts, or exit the same way you entered.
Walkthrough
Surface
The surface has three possible spawn points: North, East, and South. There are two entrances to Level 1:
- Northern stairs
- Central hole via rope
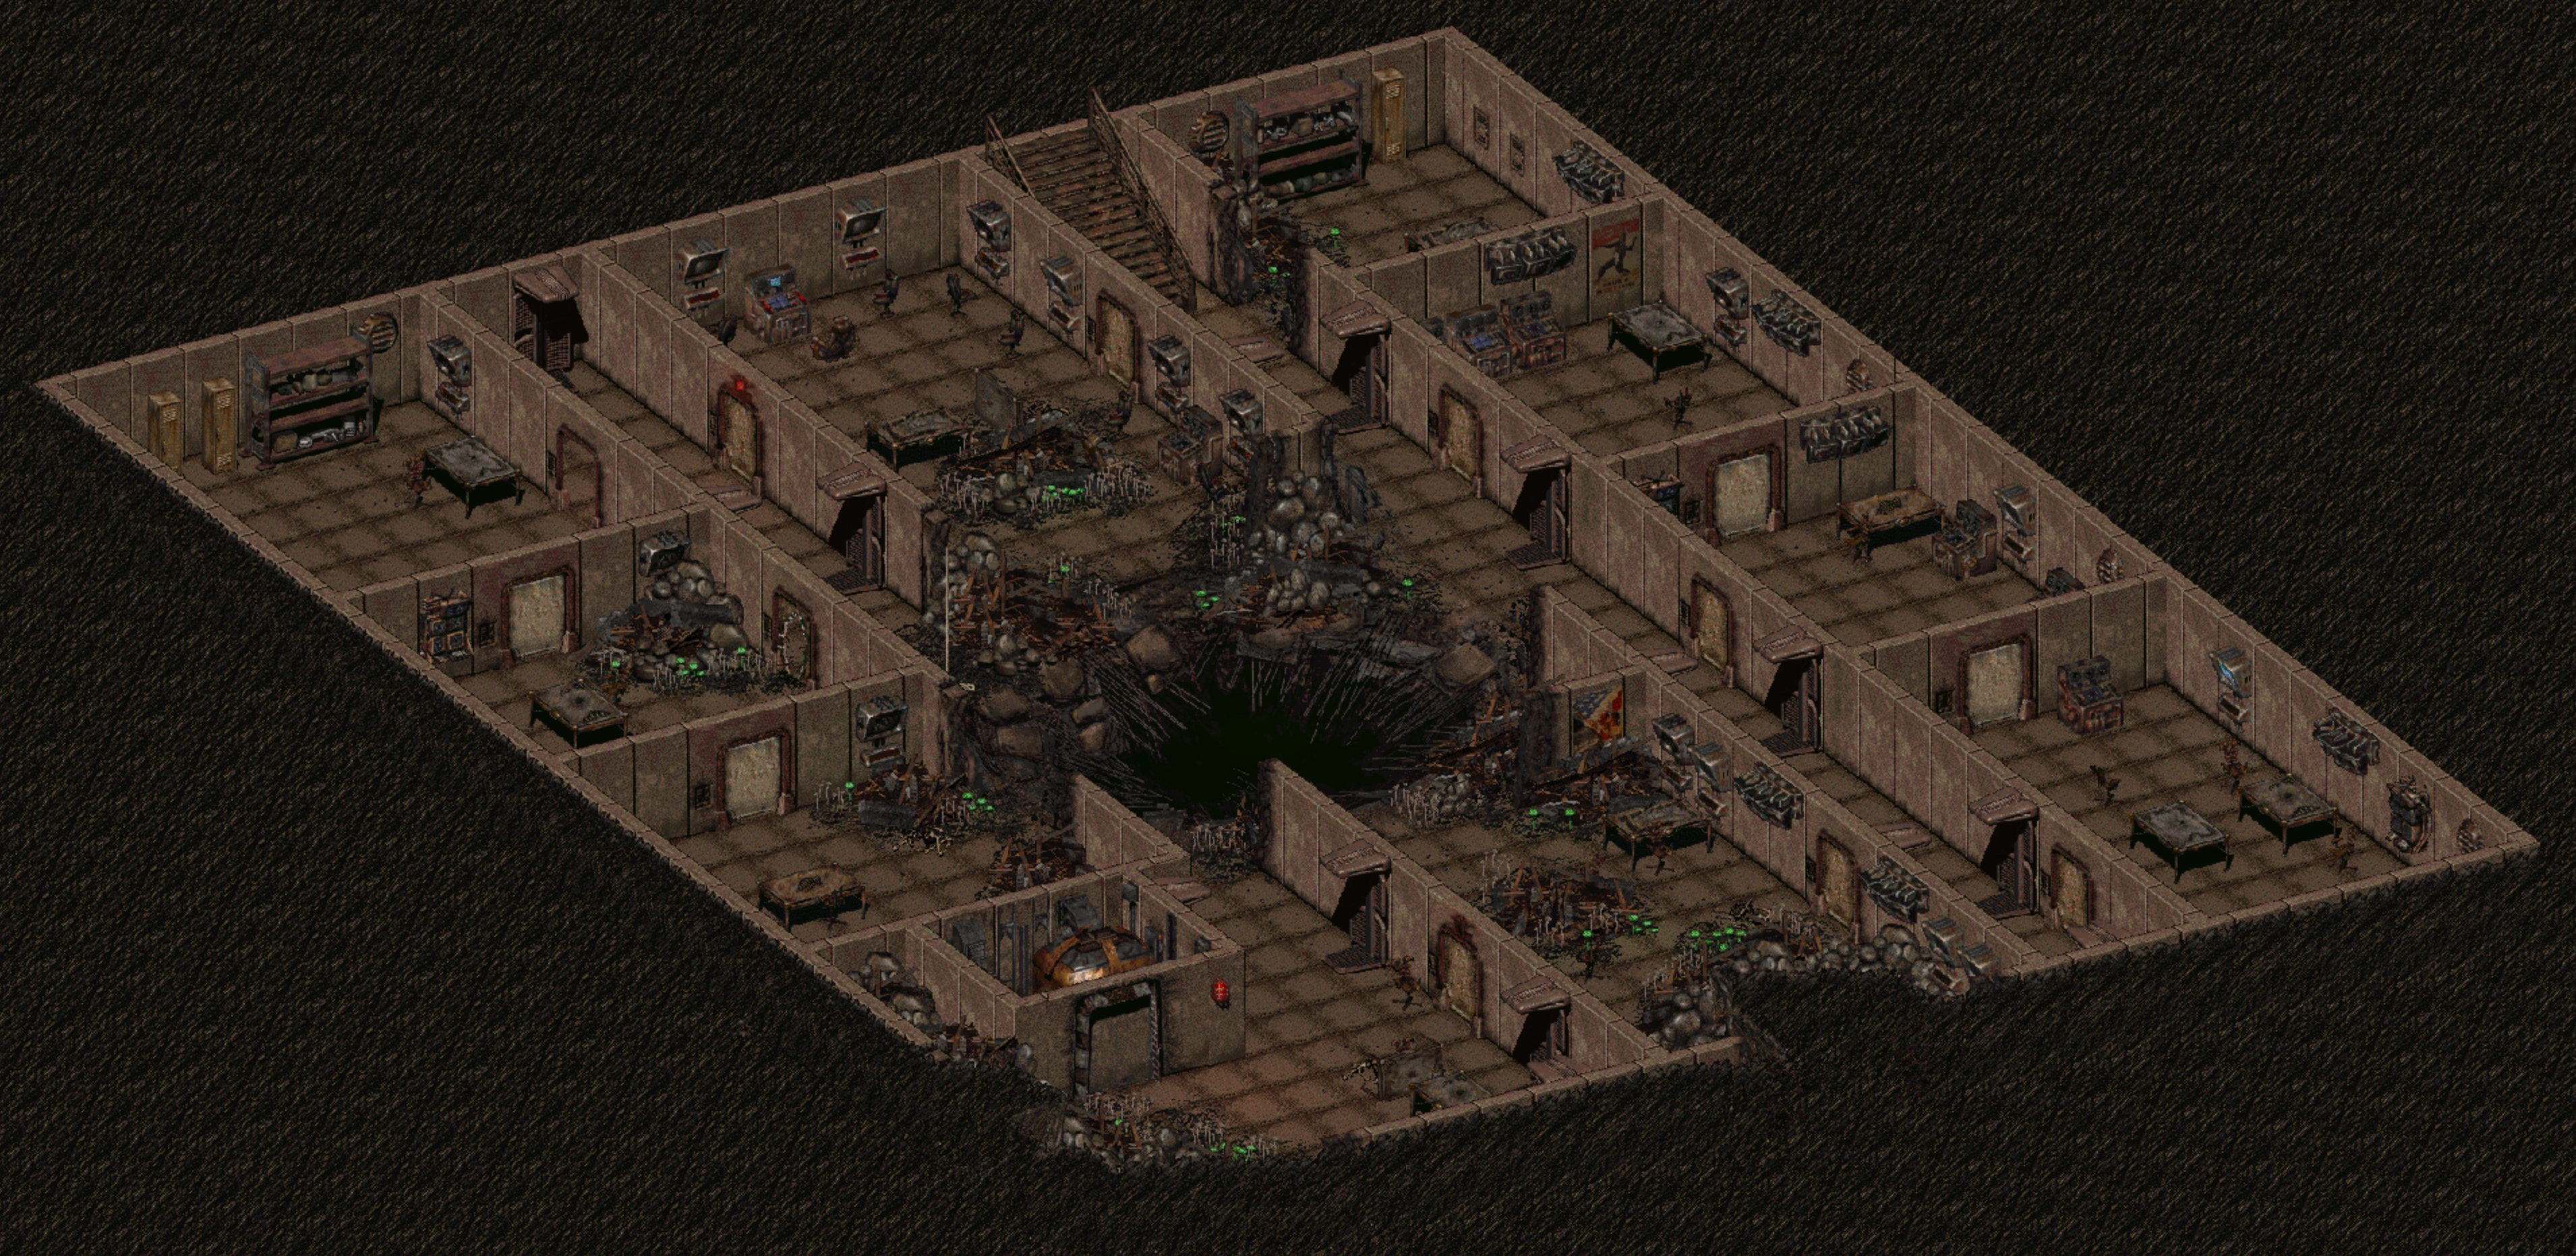
Level 1
On the first level there are two floating Eye Bots patrolling the area. Your main goal here is to find a few Yellow keycards. If you are unlucky and cannot find enough, it is best to move forward to Level 2 and continue searching there. Once you have enough Yellow cards, you can use the elevator to access Levels 1–3, or alternatively drop down the hole to reach Level 3 faster. Dropping down will cause damage and briefly knock you out, and there is always a risk that another player is waiting below for an easy kil
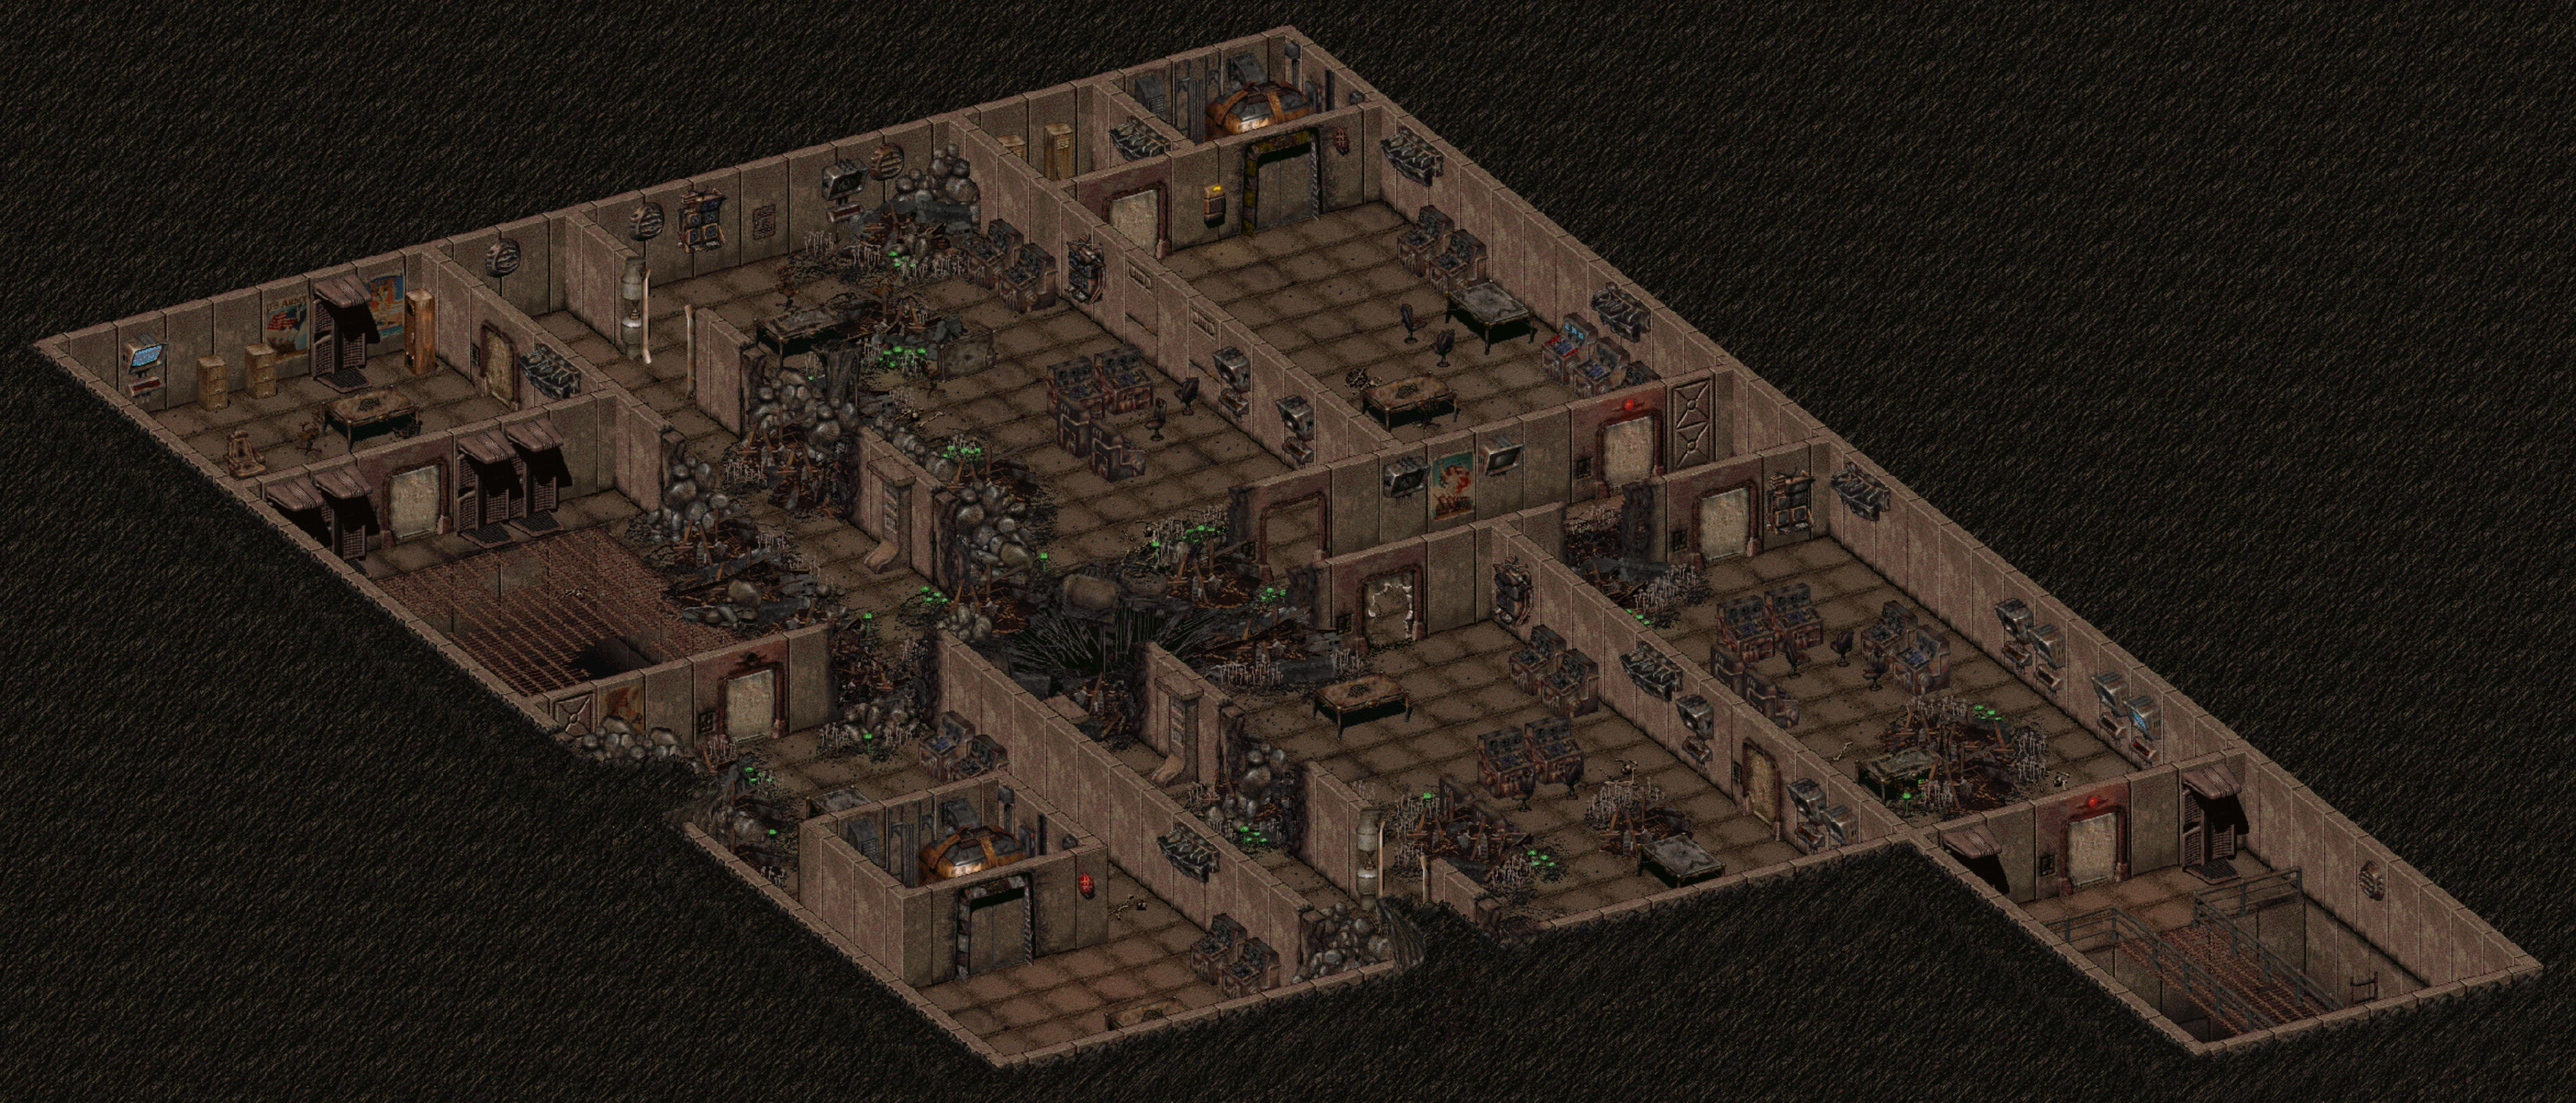
Level 2
This level can be skipped for now if you already found enough Yellow keycards on Level 1. After entering, moving north will quickly put you into combat with multiple robots. While not very strong individually, they can become dangerous when they group up and repeatedly stun you. After clearing them, loot the nearby containers and continue toward the elevator to reach Level 3. You can also use a hidden path to drop down instead.
Some areas are locked behind later progression. The top-right room near the elevator can only be opened after activating the evacuation protocol on Level 5 and contains higher tier loot. The bottom-right part of the level contains an emergency exit and the Gutsy robot boss equipped with a flamethrower. Killing it contributes toward the Glow No More achievement.
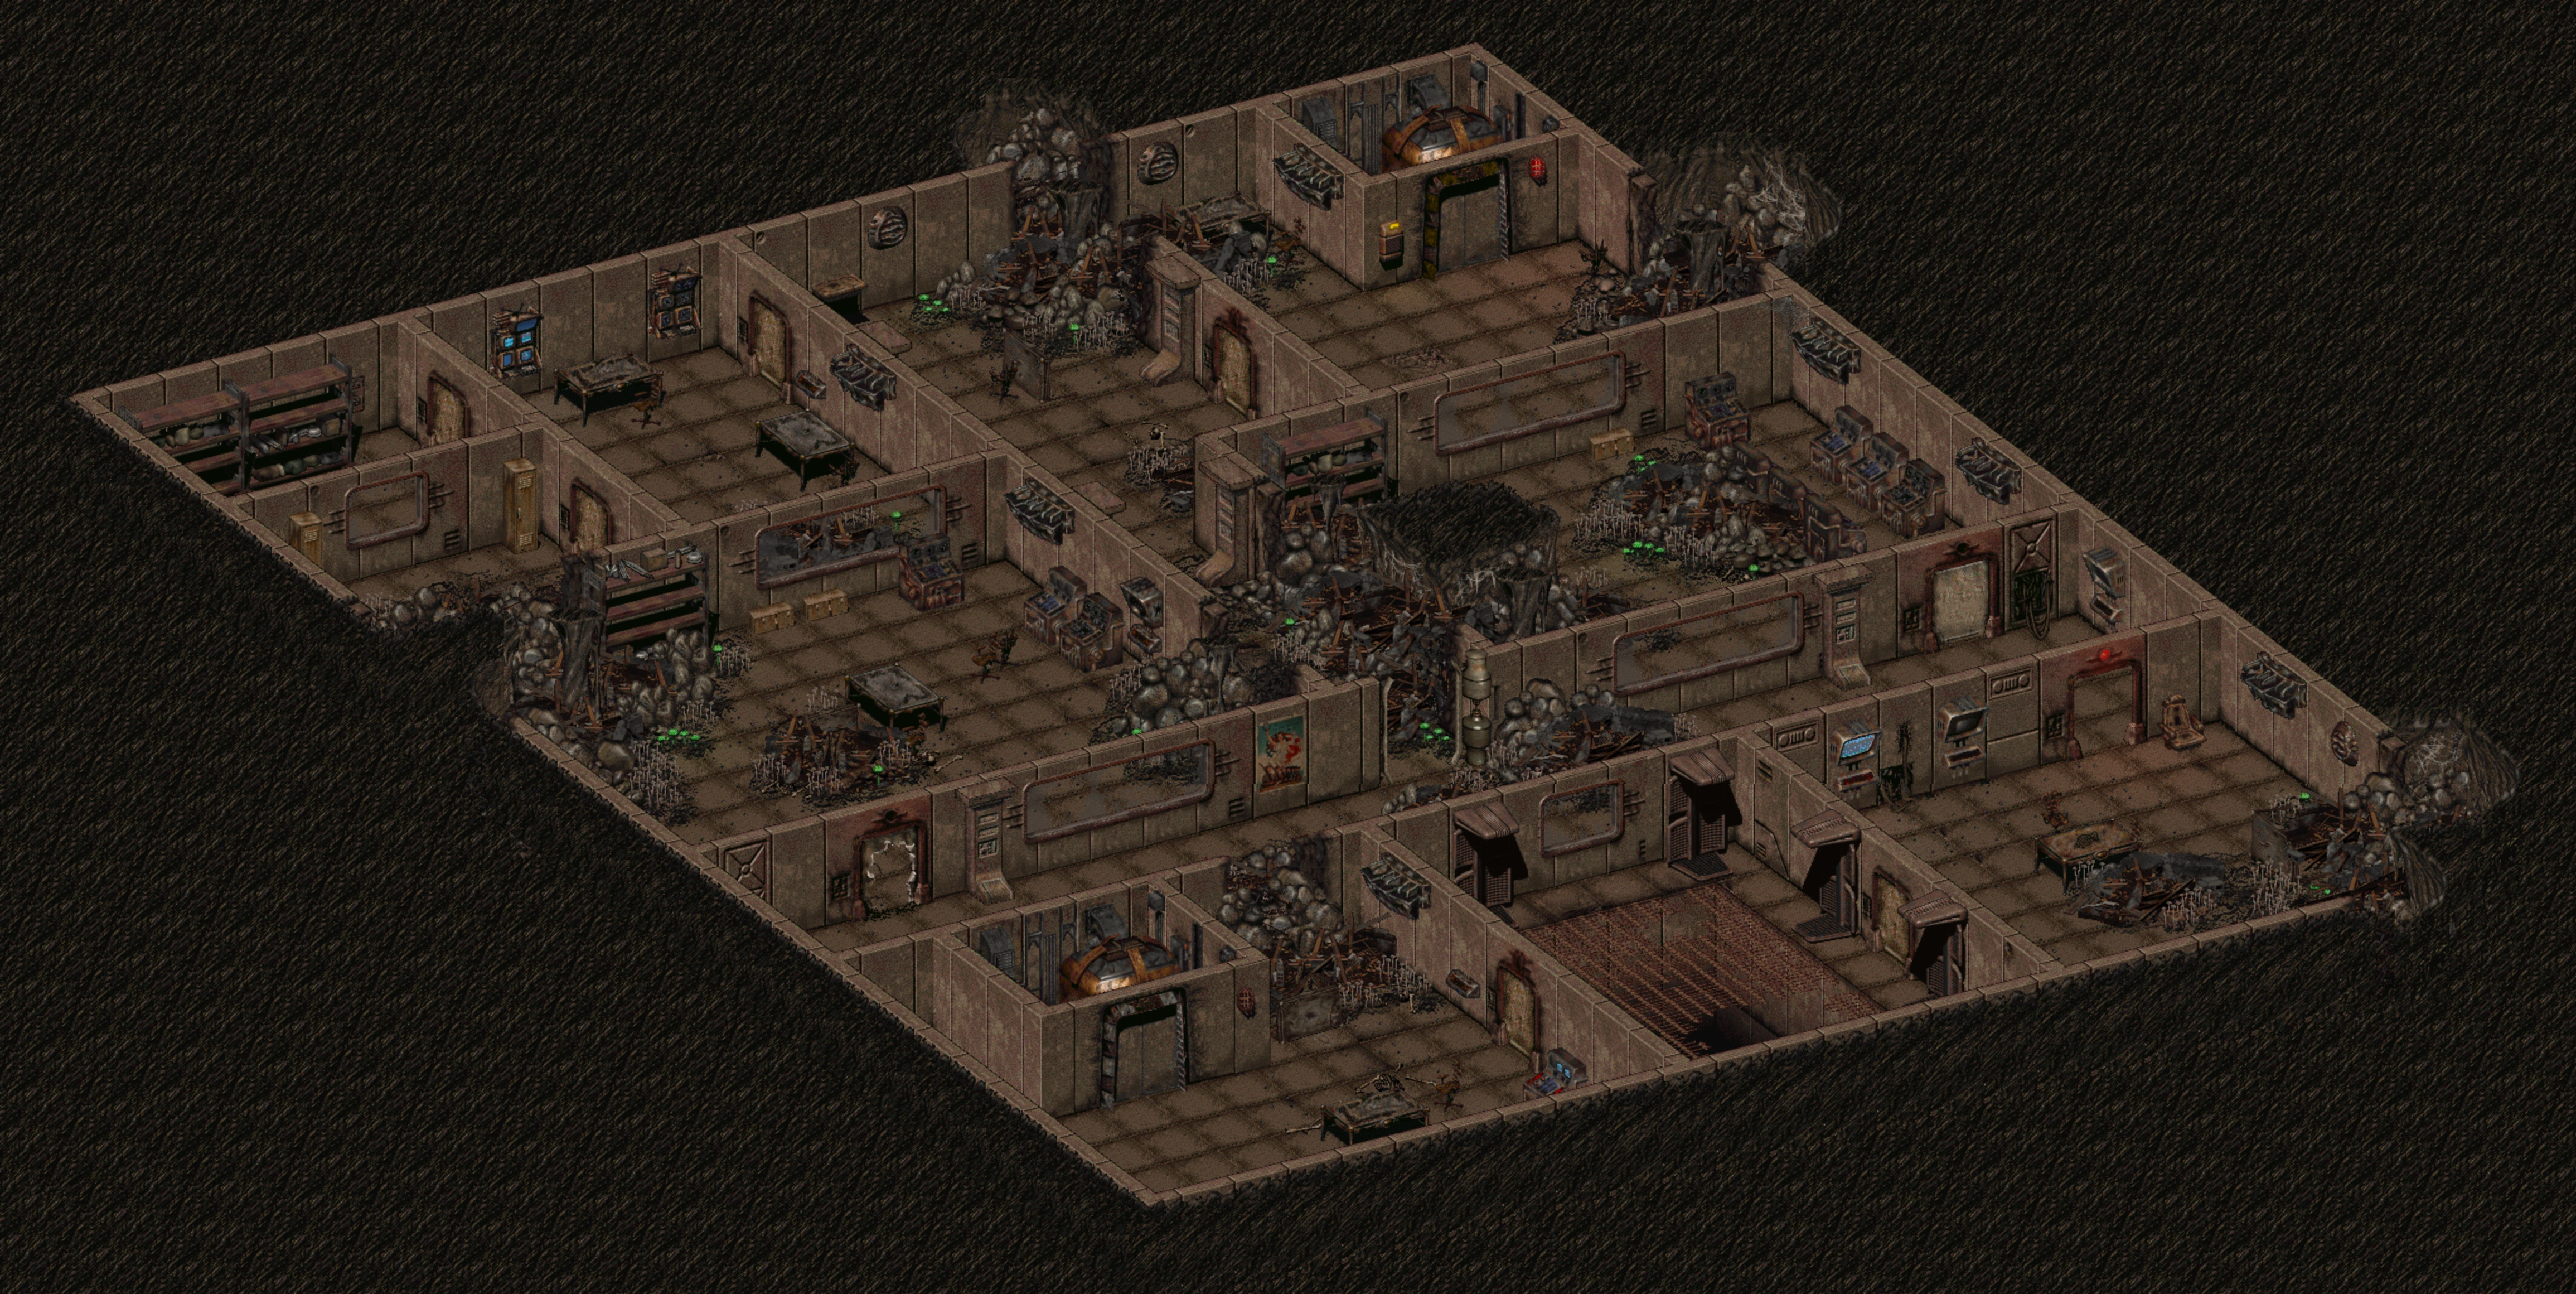
Level 3
If you arrive via elevator, the next room will be filled with several robots. It is best to fight them from a doorway or behind obstacles like the fallen table, where you can control their movement. Grouping enemies together makes area of effect attacks very effective.
There are still containers in the central rooms that may contain additional Yellow keycards if you are missing some. The top-left section contains electrically locked rooms, which require electronic lockpicks to open. These rooms often contain Red keycards and better loot.
In the top-right room near the elevator you will find a Yellow card reader, which opens access without consuming your card. From there, the elevator allows travel between Levels 2, 3, 4, and 6. Level 5 is not accessible through the elevator due to a broken door. Level 6 is optional but can provide extra cards and loot, although most efficient runs continue to Level 4.
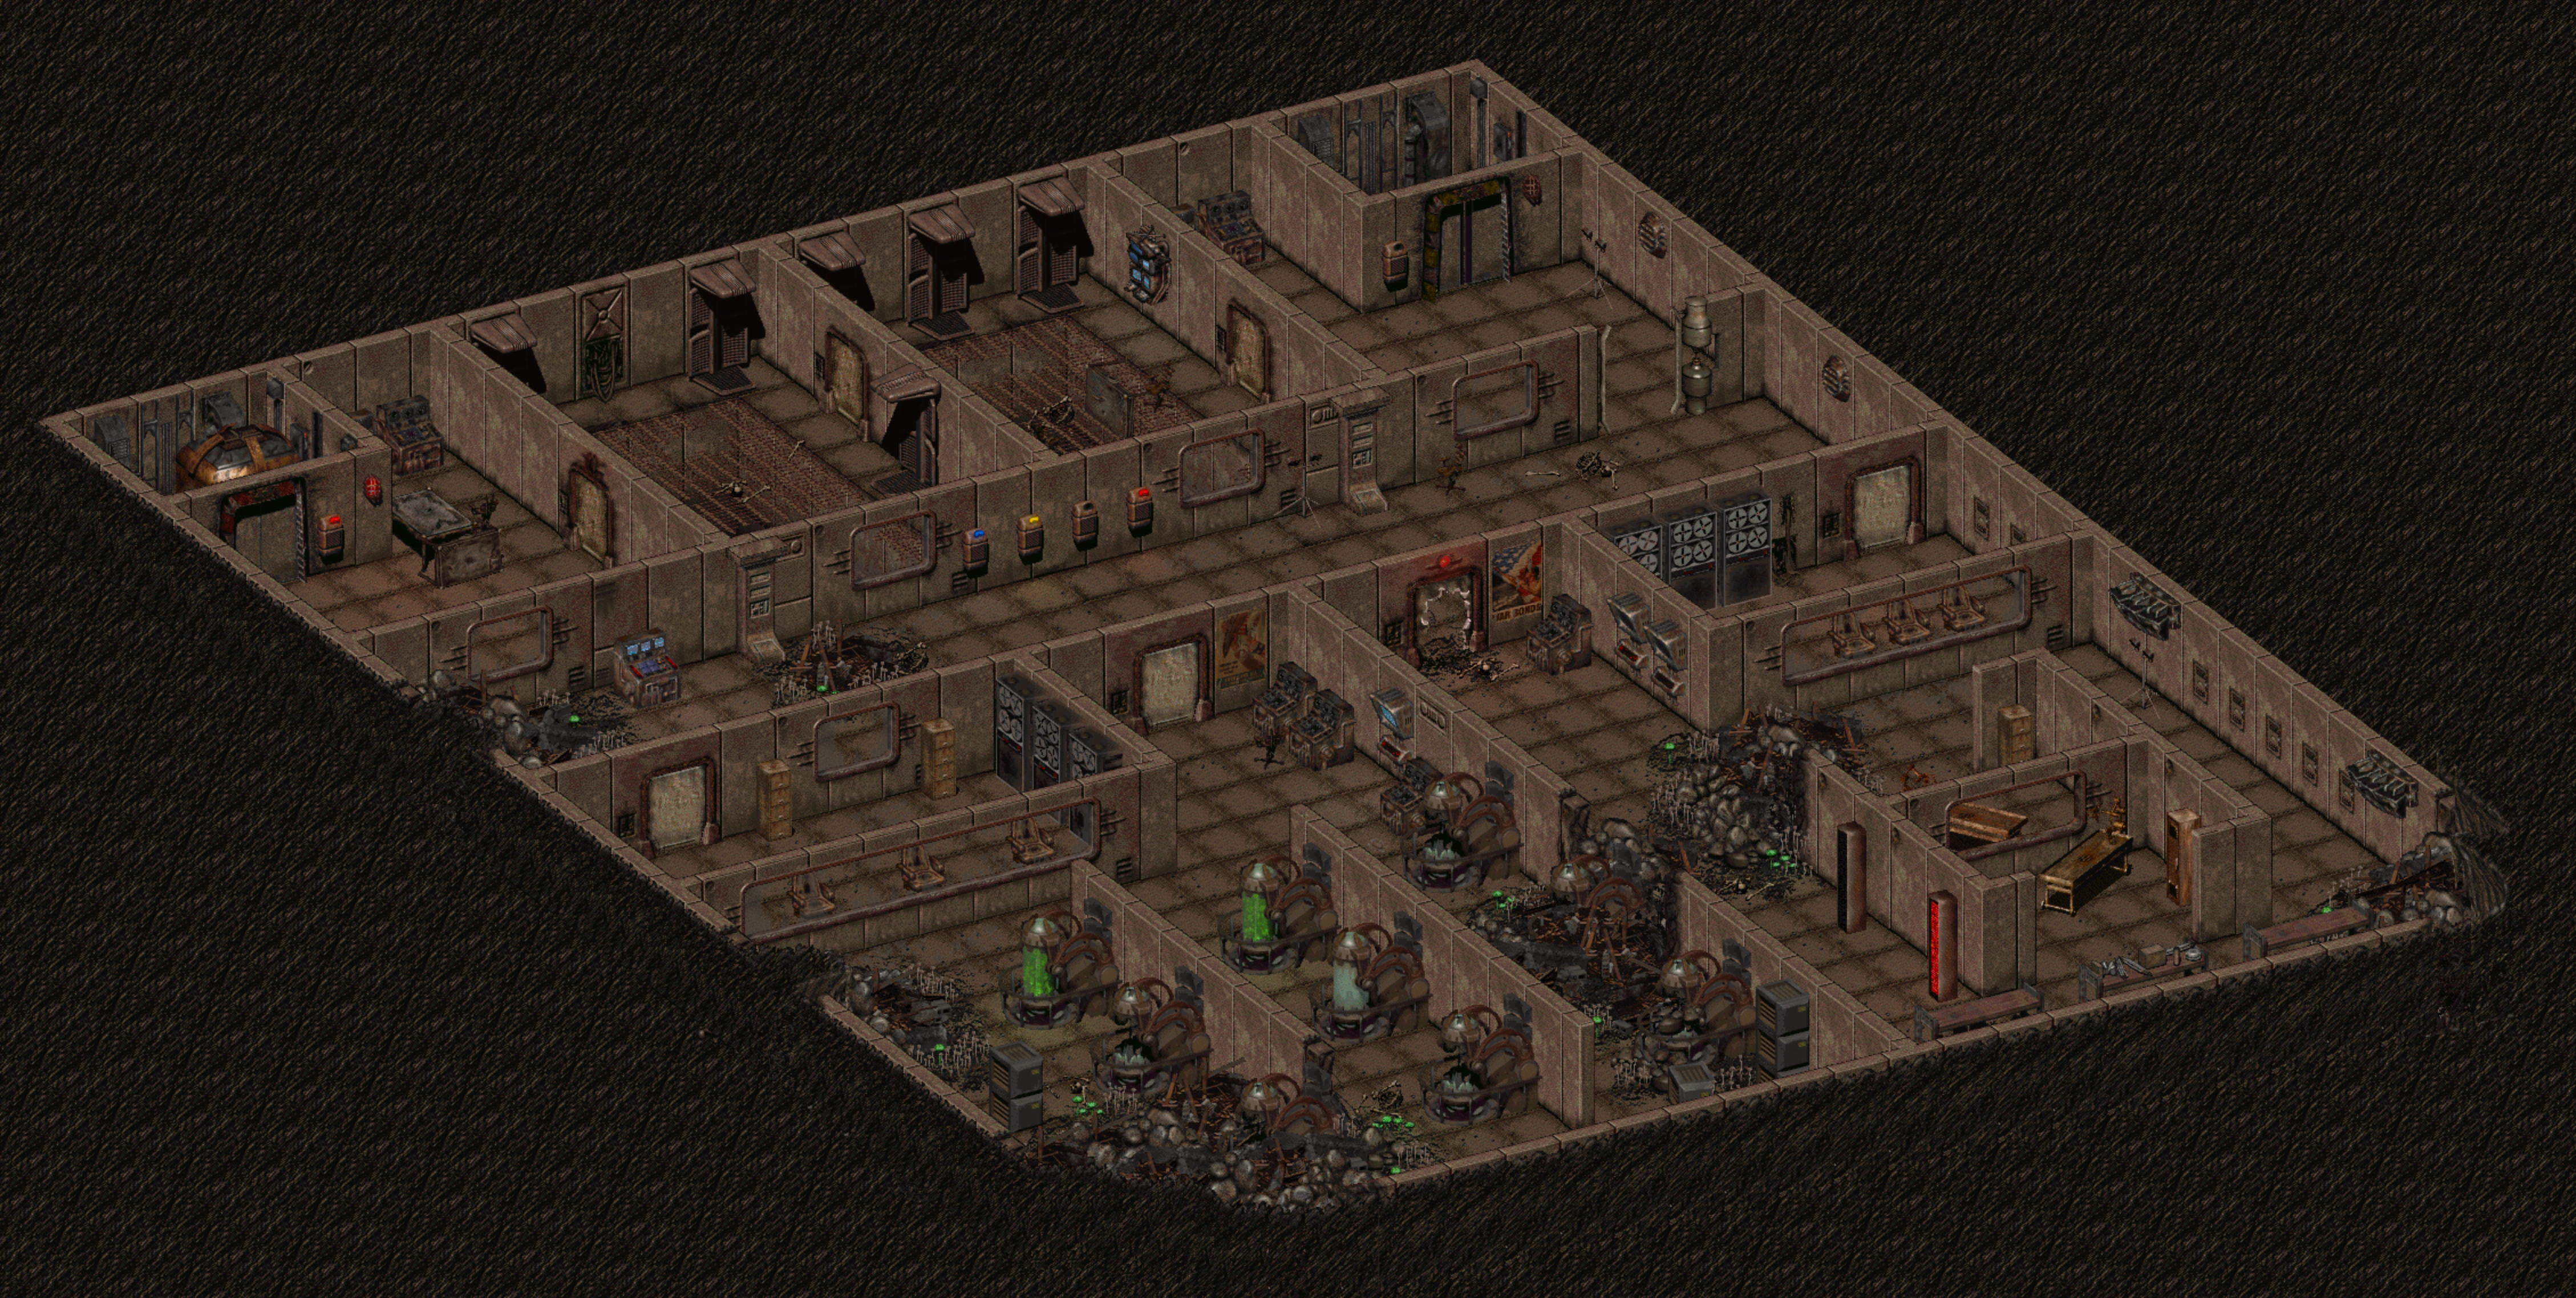
Level 4
Upon entering Level 4 you will immediately be attacked by several robots, so clearing the entrance quickly is important. Your main objective here is to collect at least three Yellow keycards and two Red keycards. The most reliable source is the locked room in the top-left corner, which requires an electronic lockpick.
If you still do not have enough cards, continue searching containers around the level or consider visiting Level 6 for additional loot. Once you have the required cards, use the large central computer to convert two Yellow keycards and one Red keycard into a Blue keycard. This gives you everything needed to access the armory on Level 5.
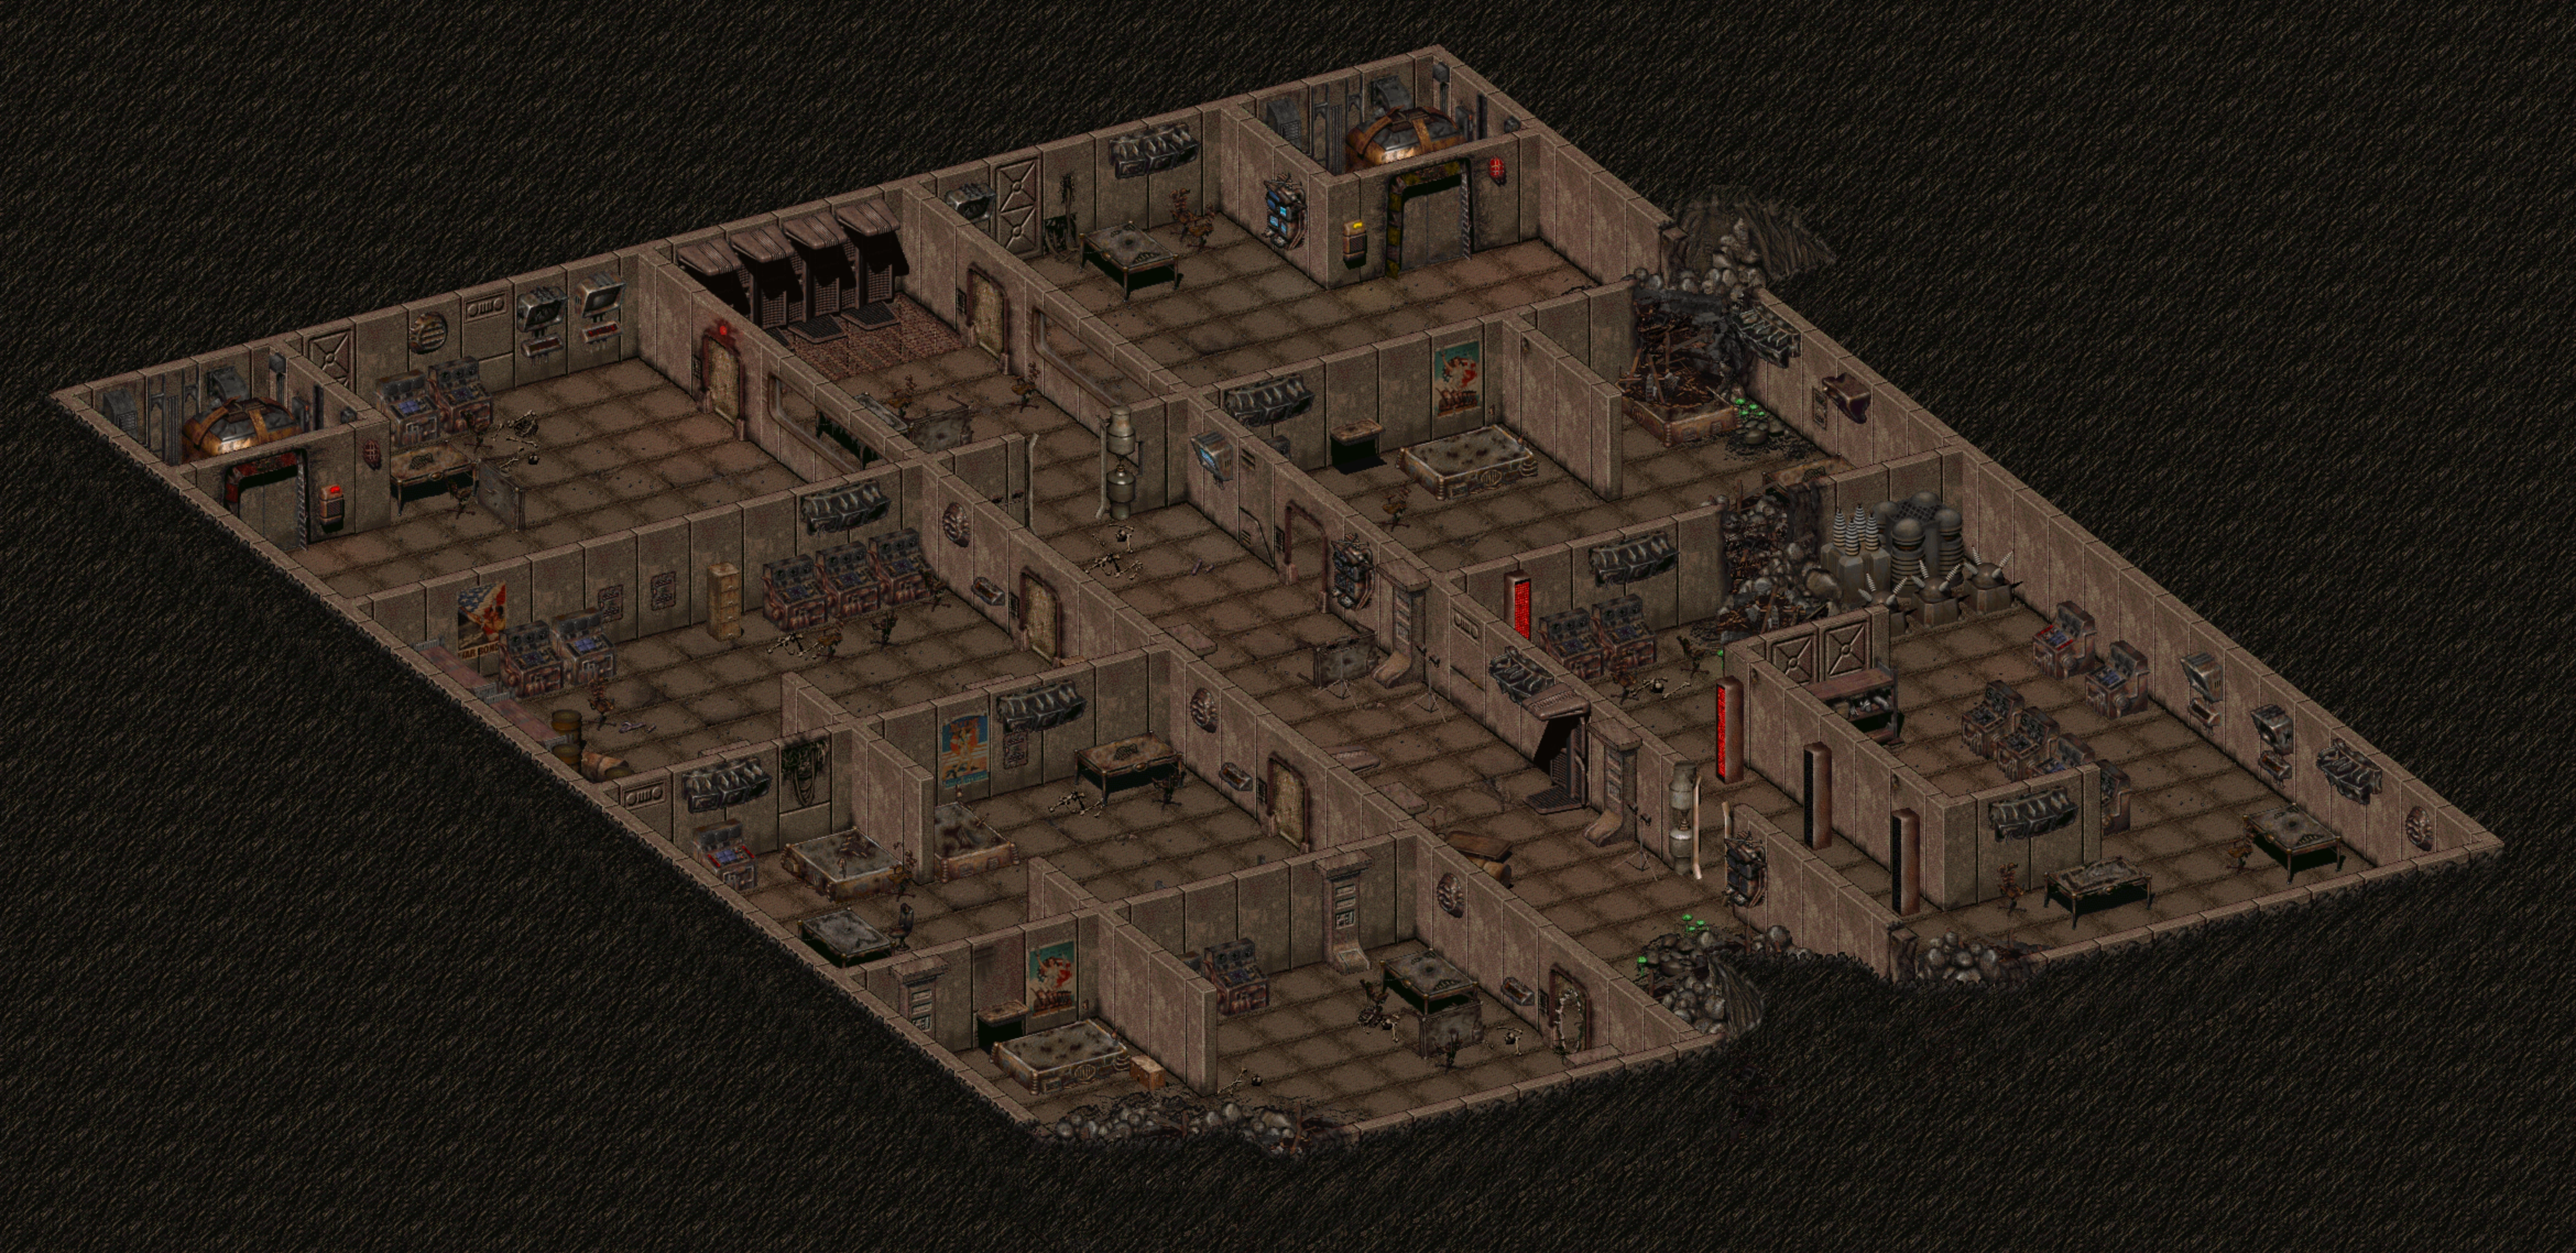
Level 5
Level 5 is the main loot area of the Glow and the primary reason most players come here. As soon as you enter, you will face a large group of robots approaching from the corridors. Using doorways and nearby furniture to block movement makes the fight much easier, and weapons with area damage or flamers are especially effective in clearing them quickly.
Once the area is secure, focus on looting. The bottom-right section contains high-value containers, while the central hallway has colored card readers that open armory doors. Unlike earlier uses, the keycards are consumed here. Inside you can find valuable items such as implants, power armor parts, high-tier weapon components, and ammunition.
After looting, you can either leave the way you came or activate the evacuation protocol using the computer in the hallway. This will open all doors in the Glow and unlock the emergency exit on Level 2 for a faster escape.
Level 6
Level 6 is an optional area mainly used if you need additional keycards or want an alternative route. Upon entering, you will be attacked by multiple robots. Clear them and move through the long hallway, where more enemies are waiting. You can pull them back into rooms to fight in safer conditions.
On the left side of the hallway there is a locked high-value room requiring an electronic lockpick. The level also contains several smaller containers and many old computers that can be scavenged for resources. The elevator in the top-left corner connects Levels 4–5-6 and provides another route through the dungeon.
Glow Surface Map

Press image to open high quality version
Glow level 1 Map
Press image to open high quality version
Glow level 2 Map
Press image to open high quality version
Glow level 3 Map
Press image to open high quality version
Glow level 4 Map

Press image to open high quality version
Glow level 5 Map
Press image to open high quality version
Glow level 6 Map
Press image to open high quality version
List of Enemies
| Name | Image | HP | EXP |
|---|---|---|---|
| Eye Bot | 227 | 20 | |
| Gutsy | 
|
267 | 300 |
| Robobrain | 
|
267 | 30 |